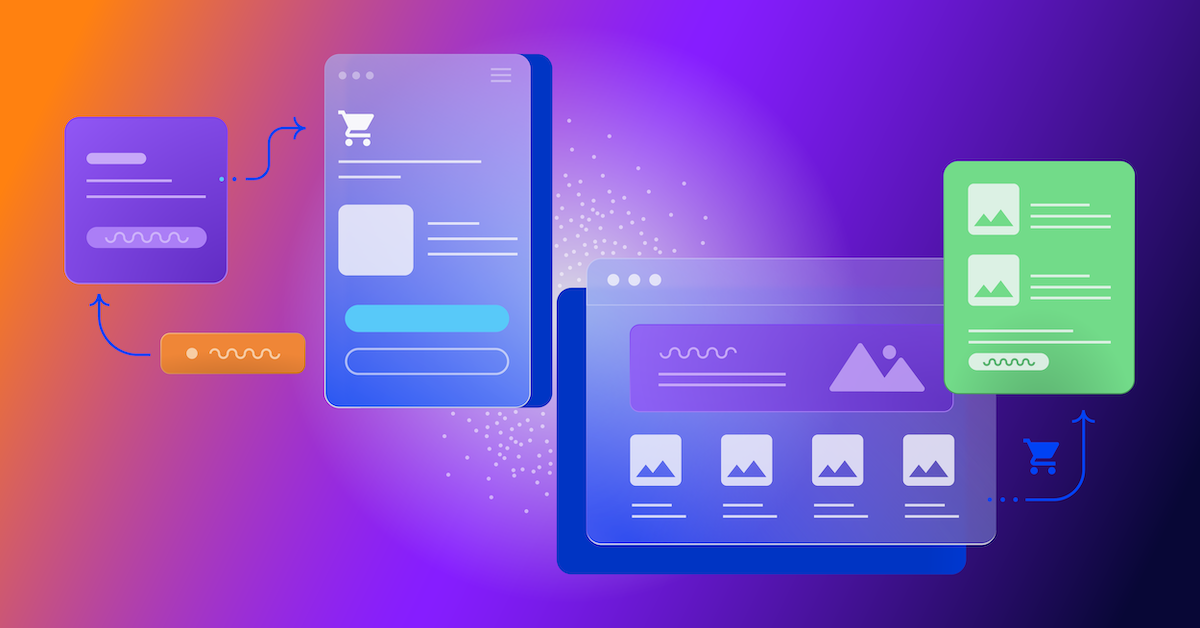
Roll Out a Product Redesign with Optimizely Feature Flags
At Opticon last month, we launched a rebrand of Optimizely. As product designers, we knew we’d have to move quickly to roll out the new brand in our product to coincide with the big Opticon launch.

Ron Severdia
But redesign projects are often complex, fraught with challenges, and take resources away from higher priorities such as designing and building new features. We would need help from engineering and infrastructure like a staging environment in order to implement changes and test in advance, all while continuing to juggle our daily priorities and backlogs.
Since our customers rely on our application to make daily business decisions, we also couldn’t adversely affect the user experience. This is where feature flags came in to help. By using a feature flag to roll out our new design and assess it in our live production environments, we were able to test, iterate, and roll out our redesign with minimal engineering help and rest easily on launch day knowing that everything would go smoothly, without affecting our customers.
Dogfooding Feature Flags with Optimizely
We started brainstorming how we could roll out our redesign with limited resources and only three weeks to go. We had Optimizely, a powerful tool for personalization and feature flagging, at our disposal and decided that it should be able to handle the changes we needed as long as we carefully planned each one individually. To meet our tight deadline, we isolated all of our changes to just CSS.
That scoped our thinking to not changing the page layout in any significant ways, just focusing on the colors, images, spacing, and fonts. So the product design team spent a week exploring different design directions that were constrained by what we could do with CSS, which was still significant.
We needed to iterate quickly, test, incorporate feedback, and collaborate with the marketing team on a final rollout before our conference. Using our own product made the product redesign process as seamless as possible.
Rapid Design Iteration
Rebranding is much more than swapping out a new logo. The product design team needed to take the new color palette and extend it for use in the product. We wanted to see how our changes would work (or not work) together in real-time so we created a simple personalization campaign using Optimizely Web which showed a “Rebrand Preview” tab to just the product design team.

With this experience in place, the design team could hover over the tab to slide open a panel containing a toggle for the new custom CSS styles.
This panel was created with HTML using the Optimizely Web editor, a WYSIWYG tool customers use to create changes on their website. With a little JavaScript, it toggled open/closed and persisted the user selections with a cookie. The JavaScript also enabled/disabled the CSS link in the <head> and added the user-defined file path you see in the CSS URL field.

Initially, only the product design team had access to this panel. We used Optimizely’s custom audiences feature—using audience attributes to check the logged-in user’s account—to target only product designers. For example, if the account for the logged-in user had the “design_team” attribute, we knew they were part of the design team and would be included in the rollout.

As the design matured, we added the attributes of other internal teams (like “engineering_team”) to the audience setting to show the rebranded UI to those teams for testing and providing feedback on the new experience. There are a number of ways we could have targeted those audiences (e.g. using a little JavaScript to check their email address or account ID), but we chose this approach.
As we got closer to the launch, we added “Stealth Mode” which hid the tab (though you could still hover over its location to open it. This enabled other teams to take product screenshots before the official launch (e.g. for marketing materials and help documentation) without having the tab visible. This consisted of adding some new CSS to our original design.
We pointed the CSS URL at the new CSS file in a Git repo so several designers could try new ideas while having the benefits of version control. This enabled us to push changes, see the results in real time, and troubleshoot those modifications all in one step. But the CSS URL could point to a local copy, a CDN, GitHub repo, or anywhere else for added flexibility or testing.
Once we were ready for internal testing, we updated our frontend webpack config to build both the rebrand and the existing CSS files side by side (optimizely_x.css and optimizely_x_rebrand.css). This allowed us to use an Optimizely fullstack feature to control which version of the actual CSS file was being served by our app, enabling a gradual rollout of the new CSS in our production app.
Ready for the Big Opticon Rollout
We could have used the same rebrand panel to roll out the final changes on launch day, but we wanted a more scalable and performant solution, so we used Optimizely Full Stack. There are two parts to setting up this feature rollout. The first part was was creating a Full Stack project in Optimizely:
- Create a new Full Stack project in Optimizely. We called ours “Rebranding”.
- Create a new feature and give it a unique name/feature key. We used “optimizely_product_rebrand”.
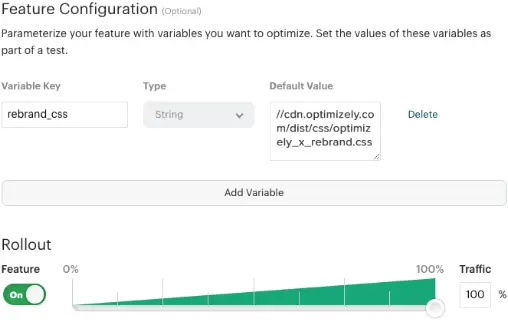
- Scroll down to the Feature Configuration section of the new feature and add a variable with the following:
Variable Key: We used “rebrand_css” as a string in this field to hold the CSS URL.
Default Value: Add the Git repo URL for the CSS file in this field, which will be substituted by the CDN URL before launch
If you have multiple CSS files in your product, create a variable with a unique key for each one. - Turn on the rollout, but keep it at 0% until you’re ready to launch.
- Save your new feature.
Your setup should look something like this:

The second step was adding a few lines of code to our application. We set up our application to implement the CSS switcher in the `<head>`. To do this, we changed this one line of code in our application `<head>`:
<link rel="stylesheet" href="//cdn.optimizely.com/dist/css/optimizely_x.css">
We then included a conditional which checks the experiment variable in the Full Stack experiment we previously created:
With this setup, when the application runs, Optimizely checks if the “rebrand_css” variable is set. If it is, the value (the CSS URL) will be used to load the styles, If not (if the rollout is disabled or set to 0%), the default/current CSS styles will be loaded.
Launch Day at Opticon
When we were ready to go live, we went to our “Rebranding” project in Optimizely, opened the “optimizely_product_rebrand” feature, and dragged the rollout slider all the way to the right to launch the new experience to 100% of our users.
![]()
What We Learned
Setting up a personalization campaign in Optimizely Web and utilizing Optimizely Full Stack enabled us to rapidly iterate on design, see the impact of our changes in the live product in real time, and required minimal engineering time to accomplish sweeping changes.
We were then able to perform phases of rollouts for internal testing before the external launch at our biggest event of the year. The product design team was able to take on this project and the only need from engineering was changing one line of code in our products to enable our campaign—which made our engineering team very happy, and minimized the impact on our customers.
About the author