How Optimizely Improved Facebook Ad Retargeting Cost by 83%
At Optimizely, we’re always looking for new ways to experiment! Our product Adaptive Audiences uses machine learning to create audiences in Optimizely based on the types of pages a visitor is viewing on your site.

Becca Bruggman

At Optimizely, we’re always looking for new ways to experiment! Our product Adaptive Audiences uses machine learning to create audiences in Optimizely based on the types of pages a visitor is viewing on your site. While thinking of ways to optimize ad spend, our SEO Lead Takeshi Young had the awesome idea to leverage the power of Adaptive Audiences to do better retargeting for our Facebook Ads, as we had previously been showing similar remarketing to everyone who visited the marketing site.
For Optimizely, our primary audiences fall into technical and non-technical buyer personas. Reaching our technical audience is a big focus and has historically been more difficult. So, we were interested in using Adaptive Audiences to do more targeted remarketing to our technical audience.
After launching the Adaptive Audience campaign, CPA for our technical audience went from $34.47 for general remarketing to $18.80 for the targeted remarketing via adaptive audiences, so an 83% overall improvement for CPA for our technical audience – which is a huge win!
Before Optimizely Adaptive Audiences

After Optimizely Adaptive Audiences
 If you would like to improve the CPA for your key buyer personas, keep reading to learn how we did it including our exact set-up for this campaign.
Step 0: Add Tags to train Optimizely’s machine learning algorithm
Adaptive Audiences requires your website to have tags set-up in Optimizely Personalization, so those will need to be configured first. Full documentation for getting these set-up can be found on Optimizely’s Knowledge Base.
At a high level, you’ll be defining the areas on your site you want catalogued for word processing by the machine learning capabilities in Optimizely.
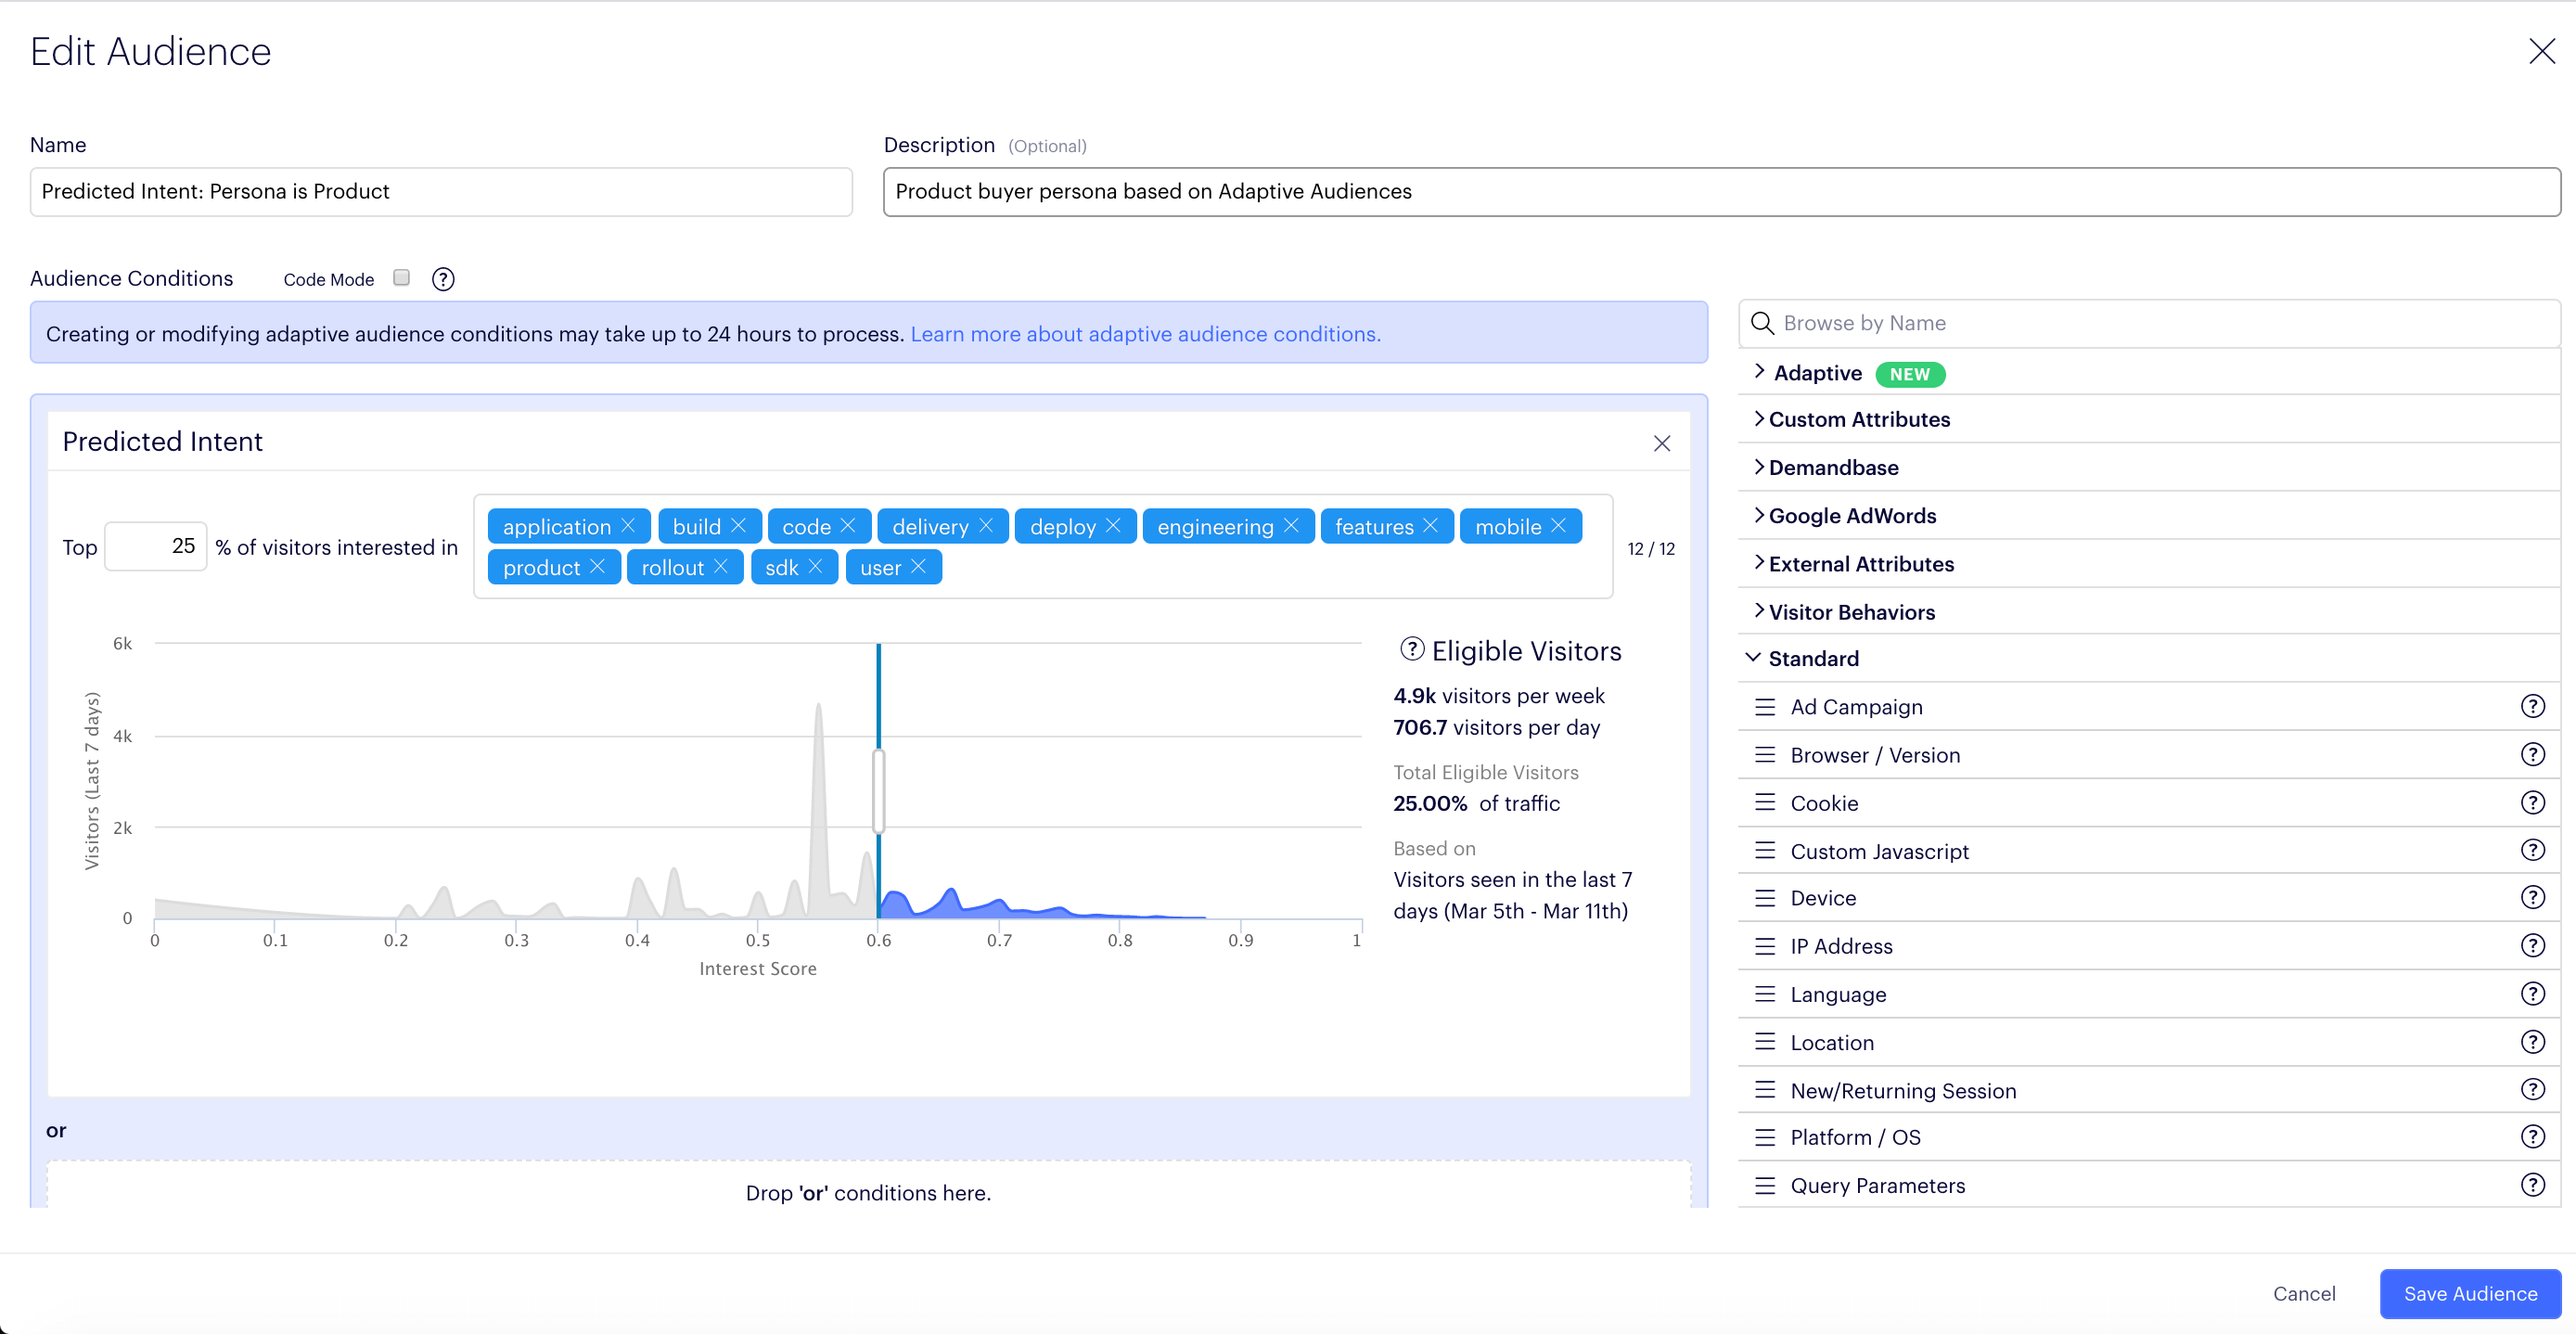
Step 1: Set-up your Adaptive Audiences
Make sure to create separate audiences for each of your key personas.
Below, you can see a gif of how to do this and our own Product Audience configuration.

Step 2: Create your Personalization Campaign
Make sure the Campaign’s URL targeting is set to your entire website so that the Facebook Pixel fires as soon as the visitor qualifies for the Adaptive Audience.
Create different experiences for each of your key persona audiences, you can see we have Product and Marketer below.

Step 3: Add Facebook pixel tracking code in the JavaScript custom code box for each experience.
Note: Update the “trackCustom” value below to match the custom event you have configured within Facebook.

Facebook Custom Tracking Code to Add in Optimizely
// optimizely utility library
var utils = window["optimizely"].get('utils');
// make sure fb is loaded then fire tracking
utils.waitUntil(function() {
 try{
 var fb_loaded = window.fbq.loaded;
 return fb_loaded;
 } catch(e){
 return false;
 }
}).then(function() {
 window.fbq('trackCustom', 'UPDATE VALUE', {});
});
Step 4: Set-up custom dynamic Ads based on your custom event tracking audiences [Facebook Documentation]
Step 5: QA in Optimizely and Facebook, then launch!
About the author