That tension between experimenting more and loading faster is real. But it's not the binary choice most people think it is. The teams running the most experiments per month aren't sacrificing performance to do it. They've just gotten smarter about how they deliver those experiments.
This guide breaks down the mechanics of client-side experimentation performance, shows you exactly how to measure it, and walks through how Optimizely's architecture keeps your pages fast while you test everything.
What actually happens when a client-side experiment runs
Client-side experimentation works by loading a JavaScript snippet in your visitor's browser. That snippet evaluates which experiments are active, decides which variation to show, and applies the changes, all before the visitor sees the page.
Two things determine how long that takes:
1. Download time
The snippet needs to travel from a CDN to the visitor's browser. Geography, device type, and connection speed all play a role. Mobile connections are slower. Visitors in regions with lower bandwidth take longer.
Optimizely keeps this fast by compressing the snippet with gzip and caching it aggressively in the browser. If the first page load takes 60ms to download but a visitor browses four pages, caching brings the average impact down to roughly 15ms. You can increase the cache TTL beyond the default two minutes for even better performance across sessions.
2. Execution time
Once downloaded, the browser has to evaluate and apply the experiments. This depends on the visitor's device speed (desktop processors handle it faster than mobile) and the number of experiments running simultaneously.
More experiments means more code to evaluate, which means more time. That's the tradeoff with traditional client-side snippets. But it doesn't have to be.
Watch out for tools that claim to be "non-blocking." They often introduce visible flicker after the page loads, and the experience shifts in front of the visitor. Blocking briefly while applying changes is better than showing the wrong thing first.
How to measure performance the right way
Gut feelings about site speed are worthless. You need data. And you need the right data, measured the right way.
Optimizely worked with the Google Chrome team to develop a rigorous framework for measuring experimentation's impact on performance. Here's the approach.
Step 1: Control the evaluation conditions
Performance measurement is an experiment in itself. You need clean conditions.
- Change management matters. During your measurement window, don't ship code changes, add or remove JavaScript, or launch campaigns that shift your traffic mix. Any of those can skew your numbers.
- Cover the full weekly cycle. Traffic patterns shift dramatically by time of day and day of week. Desktop traffic dominates during work hours. Mobile spikes evenings and weekends. A measurement window of a few hours on a Tuesday afternoon won't tell you much about your Saturday mobile visitors.
- Measure one page at a time. Different pages have different asset loads, JavaScript profiles, and visitor characteristics. Mixing them into one analysis muddies the signal.
Step 2: Pick the right metrics
This is where most teams go wrong. Traditional metrics like DOMContentLoaded measure browser internals, not what visitors actually experience.
Google's Core Web Vitals are the standard now.
Three metrics capture what actually matters to your visitors:
| Metric |
What it measures |
Why it matters |
| Largest Contentful Paint (LCP) |
Time until the largest visible element renders |
Tells you when visitors perceive the page as "loaded" |
| Interaction to Next Paint (INP) |
Responsiveness when visitors click, tap, or type |
Captures whether the page feels fast to use |
| Cumulative Layout Shift (CLS) |
Visual stability, specifically whether elements jump around |
Prevents the jarring experience of content shifting unexpectedly |
LCP is the most directly impacted by experimentation snippets and should be your primary metric. It replaced older metrics like First Contentful Paint because it better reflects what visitors actually perceive as "the page is ready."
But don't stop at performance metrics. Measure business impact too: bounce rate, engagement, purchase rate, revenue. The goal is a fast page that converts.
Step 3: Look at the distribution, not the average
Web performance data has a long tail. Some visitors load your page in 800ms. Others take 12 seconds on a 3G connection. The average of those two numbers tells you nothing useful about either visitor.
Use the median (p50) and the 90th percentile (p90). The median shows the typical experience. The p90 shows what your slowest 10% of visitors deal with, and those visitors are often on mobile, where conversions matter most.
Step 4: Segment everything
Performance isn't uniform. Break your data by:
- Geography: broadband speeds vary dramatically by country and region
- Device type: mobile devices have slower processors and connections
- Connection speed: 4G vs. WiFi vs. 3G tells very different stories
A single blended number hides the segments where performance problems actually live.
Step 5: Use real user monitoring
Real User Monitoring (RUM) is the only reliable approach. RUM captures actual performance data from real visitors on real devices and connections. Tools like your existing analytics platform, or dedicated RUM solutions, give you thetrue picture.
Synthetic testing tools (like lab-based page speed tests) can be useful for debugging, but they generate artificial traffic that doesn't represent your real visitor mix. Don't base performance decisions on synthetic data alone.
How Optimizely keeps experiments fast
Optimizely offers three approaches to experimentation, and the smartest teams combine them based on what they're testing and where performance sensitivity is highest.
Edge Delivery: client-side speed, edge-side smarts
Here's where things get interesting. Edge Delivery fundamentally changes how client-side experiments are delivered, and it's available for both Web Experimentation and Personalization customers.
The problem with traditional snippets
A standard client-side snippet contains everything: all experiment configurations, all variations, all targeting rules. Your visitor's browser downloads it all, evaluates it all, and applies only the tiny portion that's relevant to that specific visitor on that specific page.
That's wasteful. And as you scale to more experiments, the snippet grows, the download takes longer, and execution time increases.
How Edge Delivery fixes this
Edge Delivery moves experiment decisions out of the browser and onto Cloudflare Workers, edge servers distributed globally, physically close to your visitors.
Here's the flow:
Without Edge Delivery (standard snippet):
- Visitor requests your page
- Browser downloads the full snippet from the CDN (all experiments, all variations)
- Browser evaluates which experiments apply to this visitor
- Browser applies the winning variation
- Browser tracks events
With Edge Delivery:
- Visitor requests your page
- Cloudflare Worker intercepts the request
- Edge server evaluates experiments, targets audiences, and buckets the visitor before the HTML even reaches the browser
- Only the relevant variation code is sent to the browser
- Browser applies changes with minimal JavaScript
- Event tracking loads asynchronously (no render blocking)
The difference: Your visitor's browser does almost nothing. The heavy lifting happens on fast servers close to them, and only the exact code they need arrives in their browser.
The result
- Dramatically smaller payload: The browser receives only what's relevant, not the full experiment configuration.
- Faster execution: Less code to parse and run.
- Non-blocking event tracking: Conversion and click tracking loads asynchronously via a deferred tracking snippet.
- Scales without slowdown: Adding more experiments doesn't meaningfully increase what the browser has to process.
Getting started with Edge Delivery
Edge Delivery runs on Cloudflare Workers. You need:
- A Cloudflare account with your site routed through it
- The Wrangler CLI installed
- An active Web Experimentation or Personalization project
Install the SDK:
npm install @optimizely/edge-delivery@latest
Integrate it into your Cloudflare Worker:
import { applyExperiments } from '@optimizely/edge-delivery';
let control = await fetch(request);
const options = { "control": control };
await applyExperiments(request, ctx, options)
The applyExperiments method handles bucketing, targeting, and variation application. Anything that can't be resolved at the edge falls back gracefully to the browser.
Performance checklist for fast experimentation
Whether you're using standard snippets or Edge Delivery, these practices keep your experimentation fast:
The bottom line...
Experimentation and performance are two halves of the same goal: giving your visitors the best possible experience.
The teams that win are the ones that test relentlessly and obsess over speed. With the right architecture, combining Web Experimentation for velocity, Feature Experimentation for control, and Edge Delivery for the best of both, you don't have to choose.
Test more. Load faster. Both at once.
For detailed implementation guidance, visit the Edge Delivery installation docs and site performance best practices.
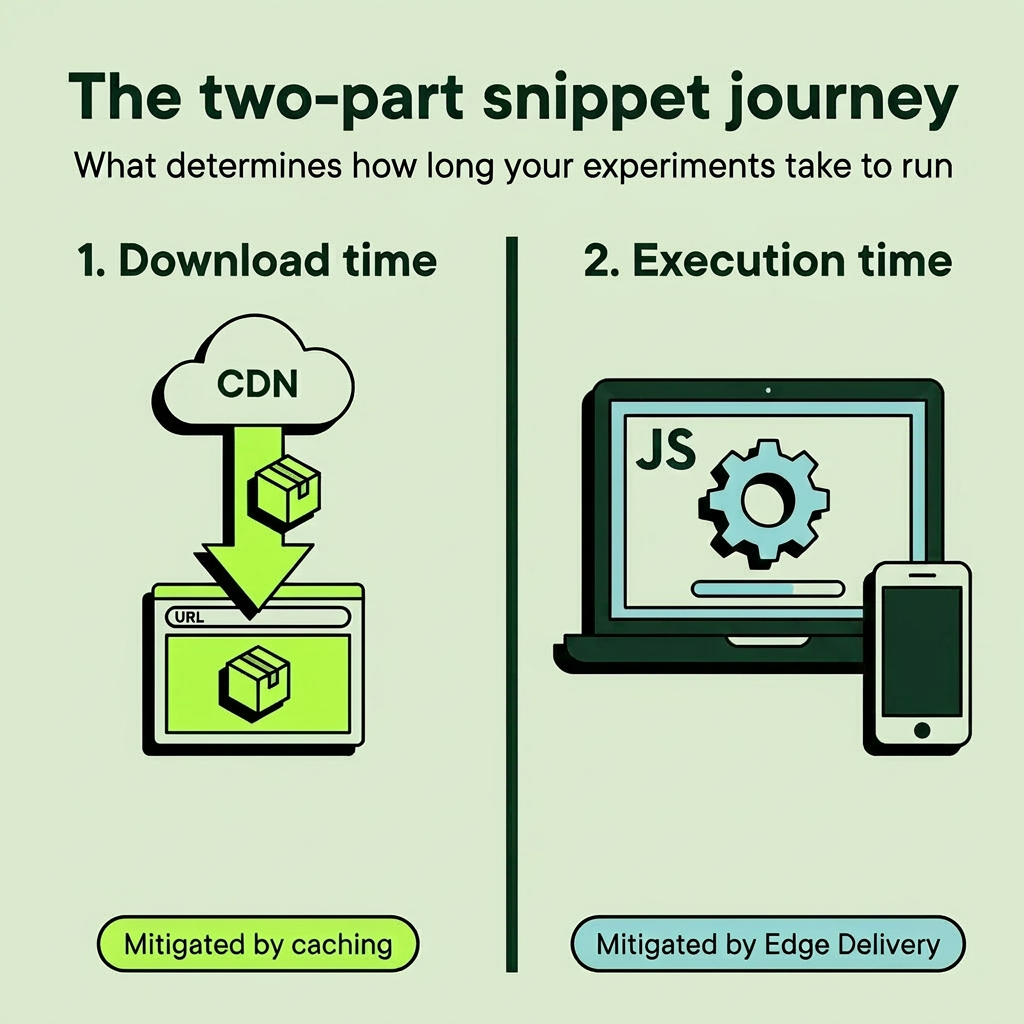 Image source: Optimizely
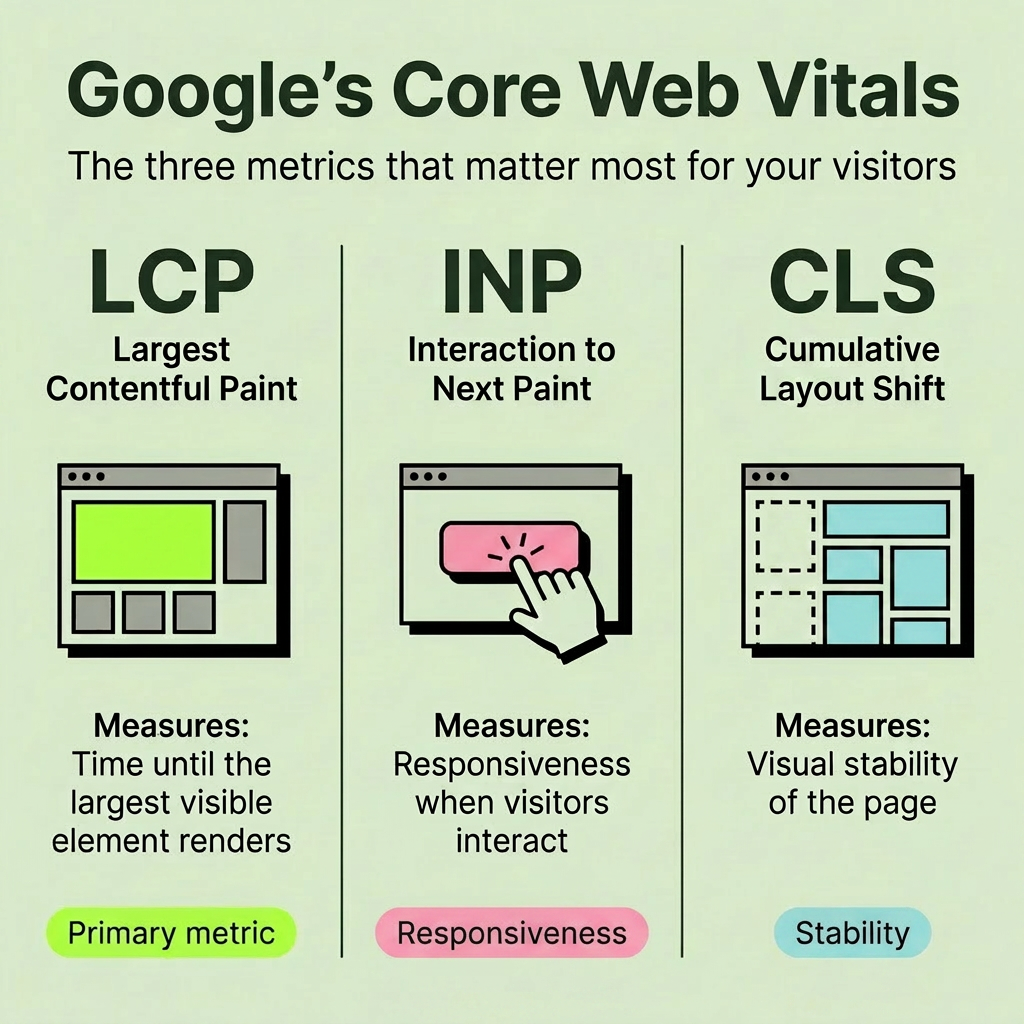 Image source: Optimizely
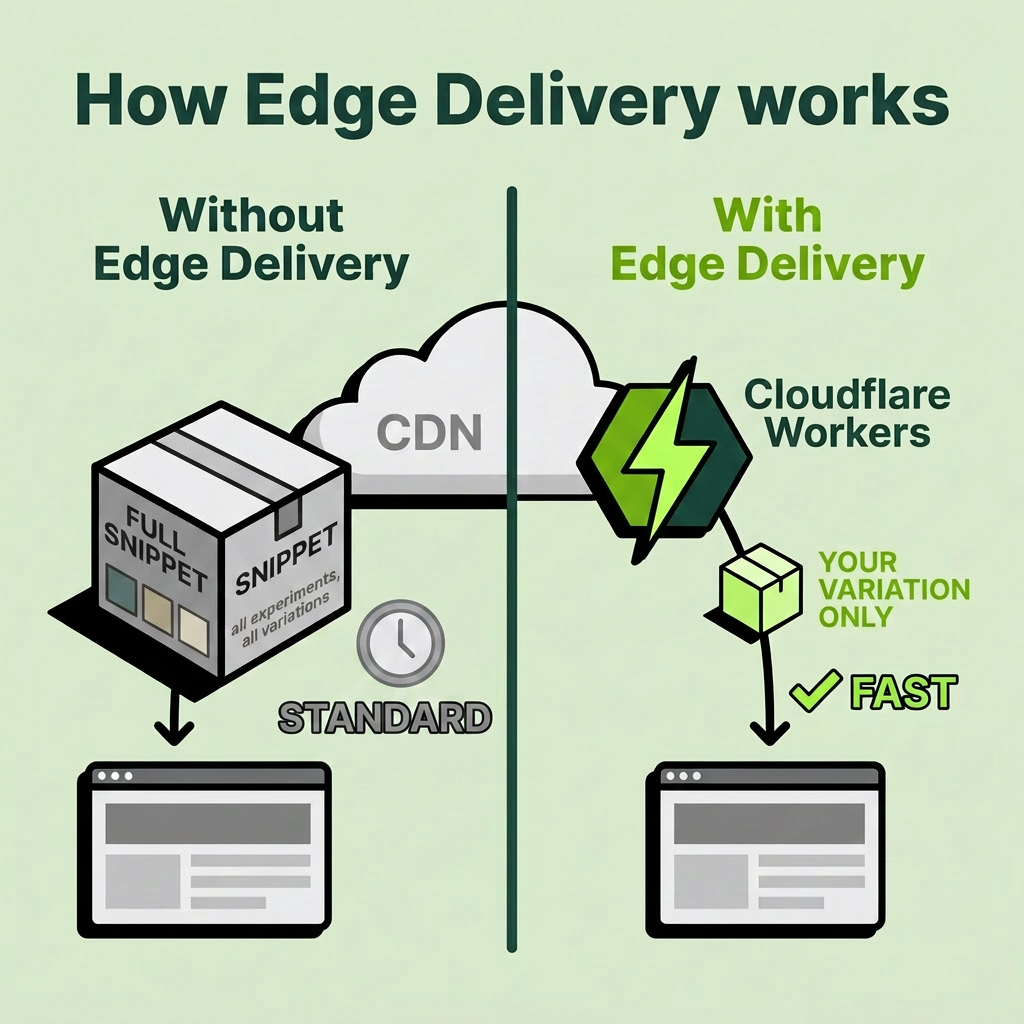 Image source: Optimizely